How To Package Your Game
A step-by-step guide to packaging your Unreal Engine game for distribution
So you finished your game? Congrats! Let's package it so other people can play it!
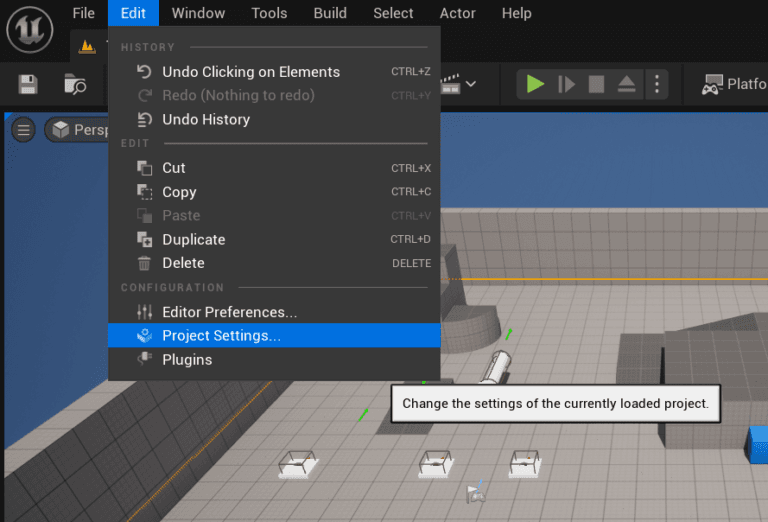
First, you need to select which level should the game start on. Let's head to your project settings.
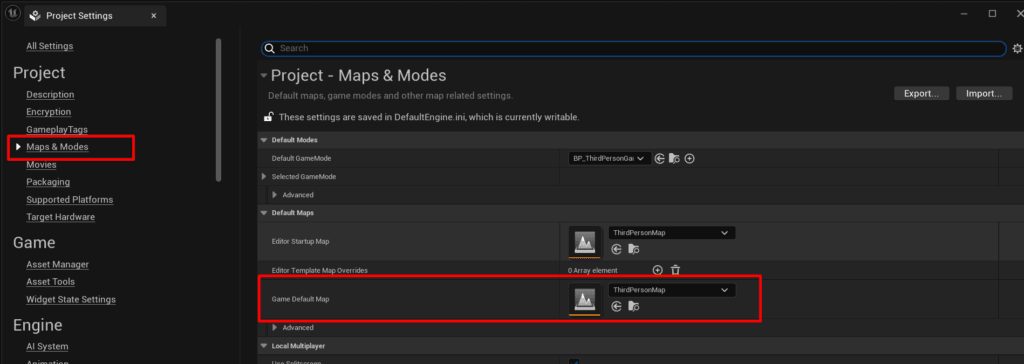
In the Maps & Modes category, look at your Game Default Map and make sure it's the correct map.
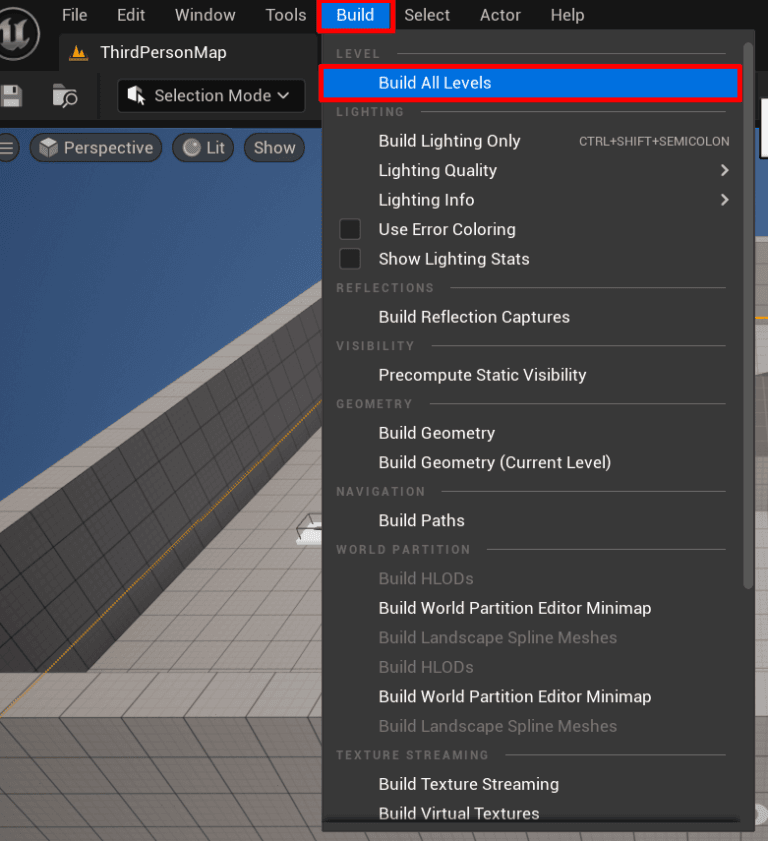
Before we actually package the project, it's important to build it. This process will build your lighting and do a lot of calculations that will make it easier to run the finished game.
You don't have to do that, but you should for the game to look its best. Click on Build All Levels under Build.
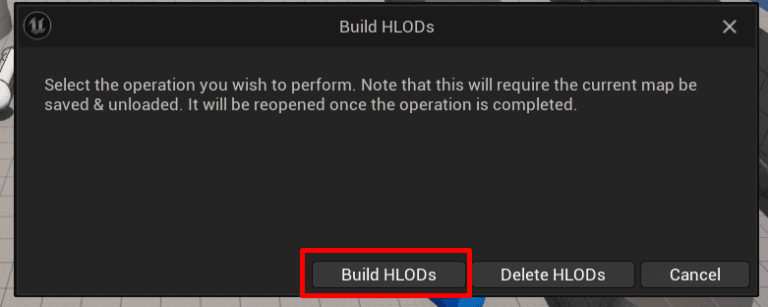
You can confirm to build HLODs.
The building process can take a long time depending on the size of your map. Don't be surprised if it takes a few hours!
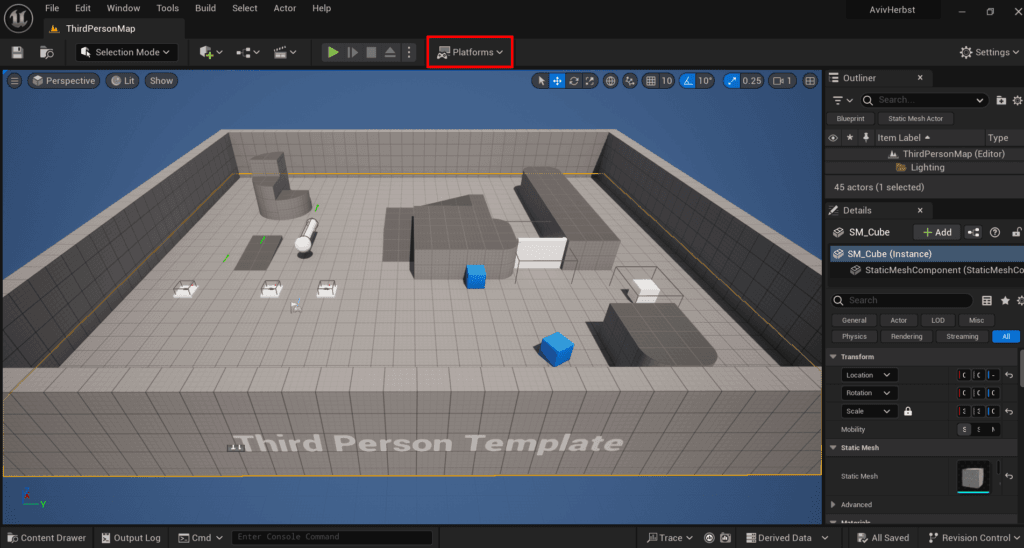
After it finishes we can finally package the game! Find the Platforms button.
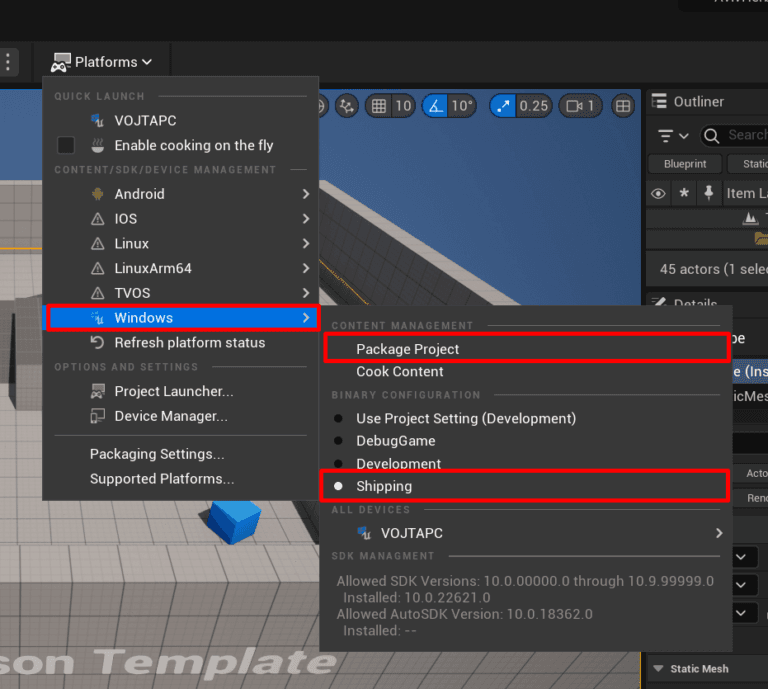
Now choose the platform (Windows) and make sure your configuration is set to Shipping. Then click on "Package Project".
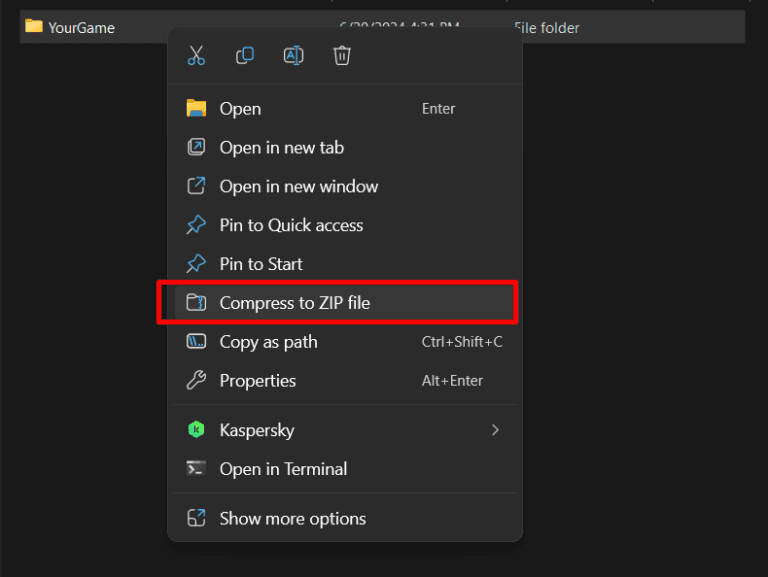
After it's done, go to the location you saved your game and zip it so you can send it to someone!